tulip tie dye rinse instructions
Discover the essential steps for rinsing your Tulip tie-dye projects to preserve vibrant colors and prevent fading. Learn how to properly rinse and care for your creations.
Understanding the Importance of Proper Rinsing

Proper rinsing is crucial for ensuring vibrant and long-lasting colors in Tulip tie-dye projects. Rinsing removes excess dye that hasn’t bonded to the fabric, preventing fading and color bleeding during subsequent washes. If dye isn’t thoroughly rinsed, it can migrate to other parts of the fabric or adjacent items, dulling the design. Cold water is recommended for rinsing, as hot water can cause colors to bleed or fade. Additionally, rinsing until the water runs clear ensures that no loose dye remains, which could affect the final appearance. Proper rinsing also helps maintain the integrity of the fabric, preventing irritation or discomfort from residual dye. By following the recommended rinsing steps, you can preserve the artistic quality and durability of your tie-dye creations. This step is foundational for achieving professional-looking results.
Overview of the Tulip Tie-Dye Process
The Tulip tie-dye process is a creative and straightforward method for achieving vibrant, personalized designs on fabric. It begins with binding or folding the fabric to create unique patterns, followed by applying the dye from Tulip’s One-Step Tie-Dye Kits. These kits include pre-measured dye powders that simplify the mixing process. After applying the dye, the fabric must be allowed to set for 6-8 hours or longer to ensure the colors fully develop. Once set, the fabric is rinsed under cold water to remove excess dye, and then washed separately in cold water with gentle detergent. This process is designed to be user-friendly, making it accessible to crafters of all skill levels. By following these steps, you can achieve professional-looking tie-dye results with minimal effort. The Tulip method eliminates the need for soda ash pre-soaks, streamlining the process for quick and satisfying outcomes.
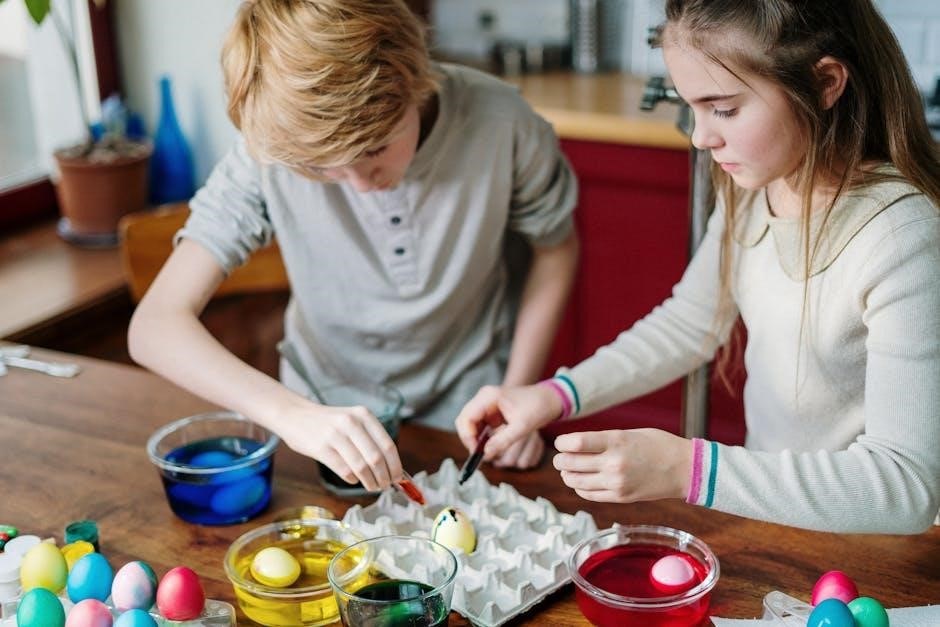
Step 1: Letting the Dye Set
Letting the dye set is crucial for vibrant colors. Allow 6-8 hours for the dye to fully bond with the fabric. Longer times enhance intensity.
Recommended Setting Time for Vibrant Colors
The recommended setting time for Tulip tie-dye projects is between 6 to 8 hours. This allows the dye to fully penetrate and bond with the fabric, ensuring rich, vibrant colors. Allowing the dye to set for longer periods, even up to 24 hours, can further enhance color intensity and durability. It’s important to keep the dyed fabric in a cool, dark place during this time to prevent any premature fading or color shifting. Proper setting is the foundation for achieving professional-looking results and making sure your tie-dye creations withstand repeated washing without losing their brightness.
Why Longer Setting Times Produce Better Results
Allowing your Tulip tie-dye project to set for an extended period ensures deeper color penetration and better binding with the fabric. Longer setting times give the dye more opportunity to fully saturate and fix into the material, resulting in more vibrant and long-lasting colors. This is especially true for Tulip One-Step Tie-Dye Kits, which already contain soda ash in the dye powder to enhance colorfastness. By letting the dye sit for 6-8 hours or even up to 24 hours, you prevent premature fading and ensure the colors remain bright after washing. A longer setting time also reduces the risk of dye running during the rinse process, making your tie-dye creations more durable and professional-looking.

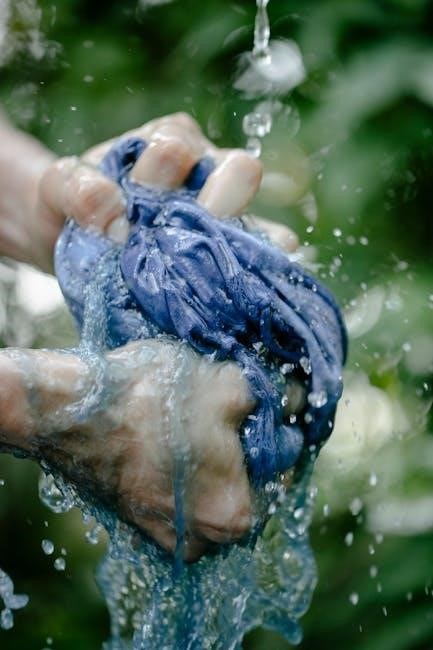
Step 2: Rinsing Your Tie-Dye Project
Initial Rinse Under Cold Water
Gently rinse your tie-dye project under cold water to remove excess dye, ensuring colors stay vibrant. Avoid wringing the fabric to prevent uneven color distribution.
The first rinse is crucial for removing excess dye without fading the colors. Gently rinse your tie-dye project under cold running water, working from the folded edges outward. Avoid wringing or twisting the fabric, as this can cause colors to bleed unevenly. Continue rinsing until the water runs relatively clear, ensuring most of the loose dye is removed. For best results, do not use hot water, as it can cause colors to fade. This step is essential before removing rubber bands or washing the garment. To enhance color preservation, some recommend adding a small amount of white vinegar to the rinse water. This helps set the colors and prevents further bleeding during subsequent washes.
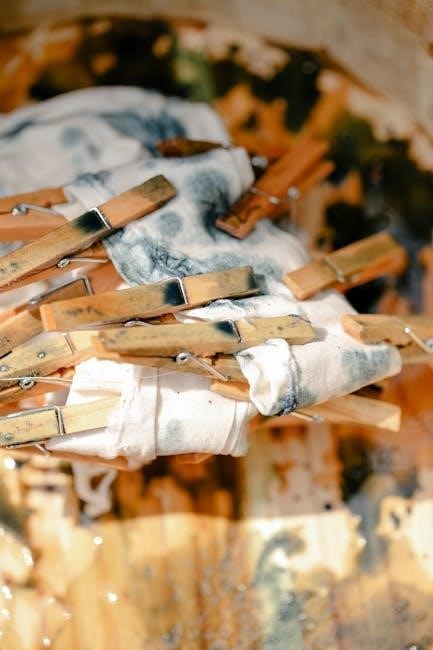
Removing Rubber Bands Safely
After rinsing under cold water, carefully remove the rubber bands to reveal your unique tie-dye design. Use scissors to gently cut the bands, working one at a time to avoid stretching or distorting the fabric. Avoid pulling or tugging on the bands, as this can misshape the fabric or disrupt the dye pattern. Remove each band slowly, taking care not to snag the material. Once all bands are removed, inspect the folds to ensure the dye has evenly saturated the fabric. Properly removing the bands prevents unwanted color bleeding and ensures your design stays crisp. This step is crucial before proceeding to the final wash, as it allows the dye to set evenly and maintains the integrity of your tie-dye creation.
Rinsing Until Water Runs Clear
Rinsing your tie-dye project until the water runs clear is a critical step to ensure excess dye is removed. Start by gently rinsing under cold water, allowing the dye to flow out without forcing it. Continue rinsing until the water is no longer colored, indicating that most of the excess dye has been removed. This step prevents excessive dye from remaining in the fabric, which could lead to fading or discoloration during the first wash. Be patient and thorough, as rushing this process may leave residual dye that affects the final result. Proper rinsing ensures that your tie-dye design stays vibrant and maintains its color integrity for a long-lasting finish.
Importance of Cold Water for Color Preservation
Cold water plays a crucial role in preserving the vibrant colors of your Tulip tie-dye project. Rinsing and washing in cold water prevents the dyes from bleeding or fading, ensuring the colors remain intense and well-defined. Hot water can cause the dye particles to break down and escape from the fabric, leading to dull, faded results. By using cold water, you lock in the colors, maintaining the integrity of your design. This step is especially important during the initial rinse and the first few washes, as it helps set the dye and prevents excessive color loss. Always opt for cold water to keep your tie-dye creations looking fresh and vibrant for a longer period.
Step 3: Washing Your Tie-Dye Project
After rinsing, gently wash your tie-dye project in cold water with a mild detergent. Place the item alone in the washer to prevent color transfer and damage.
Preparing the Washing Machine
To ensure the best results when washing your tie-dye project, prepare your washing machine by setting it to the largest load capacity. This allows enough space for the dyed fabric to move freely, preventing excessive friction that could damage the material or cause colors to bleed. Use cold water, as heat can fade the vibrant hues of the tie-dye design. Select a gentle wash cycle with minimal agitation to protect the fabric and preserve the colors. Avoid overloading the machine, as this can lead to uneven washing and potential damage to your project. Place the tie-dye item alone in the washer to prevent dye transfer to other clothes. Add a small amount of mild, color-safe laundry detergent to maintain the integrity of the fabric and the dye. Always check the fabric care label for specific washing instructions to ensure optimal care for your tie-dye creation.
Using Gentle Laundry Detergent
When washing your Tulip tie-dye project, it’s crucial to use a gentle laundry detergent to protect the vibrant colors and fabric. Opt for a mild, color-safe detergent that is free from harsh chemicals like bleach or fabric softeners, as these can strip the dye from the fabric. A gentle detergent ensures that the colors remain vivid and prevents fading. Avoid using heavy-duty detergents, as they can damage the fabric and weaken the dye’s bond with the material. For the best results, choose a detergent specifically designed for washing colored or tie-dye fabrics. This will help maintain the integrity of your design and keep your tie-dye creation looking fresh and vibrant for a longer period.
First Wash: Separate and Cold Water Settings

The first wash of your Tulip tie-dye project is critical for preserving its vibrant colors. Always wash the item separately from other laundry to prevent dye from transferring to other fabrics. Use cold water, as heat can cause colors to fade or bleed. Set your washing machine to a gentle cycle with cold water to minimize agitation, which can damage the fabric or dislodge the dye. Avoid using fabric softeners or bleach, as they can dull the colors or weaken the dye’s bond with the fabric. Place the tie-dye item in the washer alone, ensuring it has enough space to move freely during the cycle. After washing, remove it promptly to prevent it from resting wet, which could lead to color migration or damage to the fabric.
Subsequent Washes: Maintaining Color Vibrancy
After the initial wash, continue to care for your Tulip tie-dye project by washing it in cold water to preserve the colors. Use a gentle laundry detergent and avoid fabric softeners or bleach, as these can dull the vibrant hues. While it’s okay to wash the item with similar colors after the first few washes, it’s best to keep it separate from heavily soiled or dark-colored fabrics to prevent any residual dye from bleeding. Avoid using hot water, as it can cause fading. For optimal results, air dry the item instead of putting it in the dryer, as heat can damage the fabric or weaken the dye’s bond. By following these steps, you’ll help maintain the brilliance and longevity of your tie-dye creation.
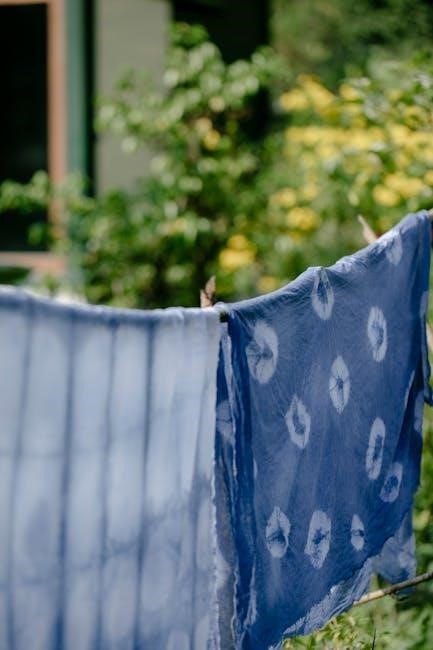
Step 4: Drying Your Tie-Dye Project
Air dry your tie-dye project to preserve colors. Avoid direct sunlight and heat, as they can cause fading. Cool, shaded areas are ideal for drying.
Air Drying for Optimal Results
Air drying is crucial for maintaining the vibrancy and durability of your Tulip tie-dye project. After rinsing and washing, gently remove excess water without wringing the fabric. Lay the item flat on a clean, dry surface or hang it from a clothesline in a shaded area. Avoid exposure to direct sunlight, as UV rays can cause colors to fade. Use a drying rack if needed, ensuring good airflow around the fabric. Do not place the item in a dryer, as heat can damage the fibers and dull the colors. Allow the fabric to air dry completely, which may take several hours depending on the thickness of the material. Proper air drying ensures your tie-dye design stays bright and intact for a longer time.
Avoiding Direct Sunlight and Heat
To preserve the vibrant colors of your Tulip tie-dye project, it’s essential to avoid direct sunlight and heat during the drying process. Direct sunlight can cause the dyes to fade, while heat from dryers or radiators can damage the fabric fibers and dull the colors. Instead, opt for air drying in a shaded area or indoors, where the fabric can dry naturally without exposure to harmful UV rays. Avoid placing the item near heaters or fireplaces, as excessive heat can weaken the fabric and ruin the design. By keeping your tie-dye project away from direct sunlight and heat, you ensure the colors remain bold and the fabric stays intact for years to come.
Preventing Color Fading

To keep your Tulip tie-dye colors vibrant and prevent fading, wash your project in cold water using a gentle, color-safe detergent. Avoid using hot water or harsh chemicals, as these can strip the fabric of its dye. For added protection, consider rinsing your project in a mixture of cold water and white vinegar after the initial rinse. This helps set the colors and ensures they last longer. Additionally, washing your tie-dye item separately from other clothes, especially in the first few washes, prevents color transfer and fading. Air drying is also recommended, as high heat from dryers can damage the fabric and dull the colors. By following these care tips, you can enjoy your vibrant tie-dye creations for years to come.
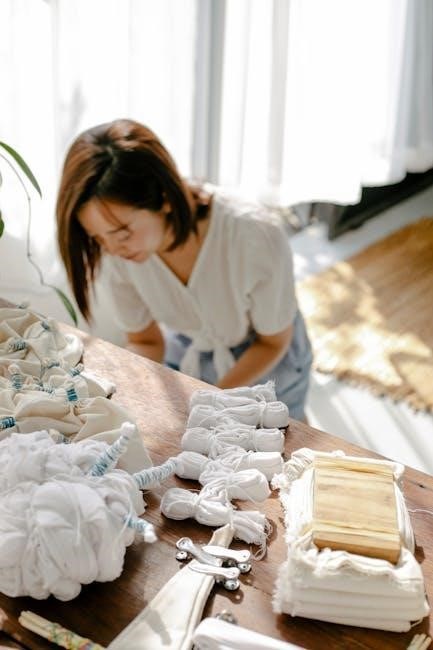
Additional Tips for Tulip Tie-Dye Care
For lasting results, wash tie-dye items separately and use gentle detergents. Check fabric care labels for specific instructions and avoid soaking dyed fabrics in hot water.
Washing Tie-Dye Separately
Washing your tie-dye creations separately is crucial to prevent color transfer and fading. This ensures vibrant colors stay intact and avoids ruining other clothes in the wash.
Using Vinegar for Colorfastness
Using vinegar is a simple and effective way to enhance colorfastness in your tie-dye projects. After rinsing excess dye, soak your project in a solution of one part white vinegar to four parts cold water for about 30 minutes. This step helps lock in the colors and prevents fading. Gently agitate the water to ensure the vinegar solution evenly distributes. After soaking, rinse thoroughly with cold water to remove excess vinegar. This optional step is recommended for projects where color preservation is a priority. Vinegar acts as a natural mordant, improving the dye’s adherence to fabric. It’s especially useful for handmade or delicate items. While not required, it adds an extra layer of protection for your vibrant designs.
Checking Fabric Care Labels
Before rinsing or washing your tie-dye project, always check the fabric care label for specific instructions. Different fabrics, such as cotton, polyester, or blends, may require unique care. Look for symbols or guidelines that indicate whether the fabric can be machine washed, hand-washed, or dried naturally. Some fabrics may shrink or lose color when exposed to heat, so understanding these details is crucial. If the fabric is delicate or requires cold water, adjust your rinsing and washing methods accordingly. This step ensures that your tie-dye design remains vibrant and the fabric stays intact. By following the care label’s advice, you can avoid damage and maintain the quality of your project. Always prioritize fabric-specific care to achieve the best results for your Tulip tie-dye creations.
Successful tie-dye projects require careful rinsing and washing. Follow instructions, use cold water, and gentle detergent to preserve colors. Air dry and wash separately to prevent fading.
Proper care for Tulip tie-dye projects involves several critical steps to ensure vibrant, long-lasting colors. Start by letting the dye set for 6-8 hours or longer for intense results. Rinse thoroughly under cold water to remove excess dye, then carefully remove rubber bands. Wash the item separately in cold water with gentle detergent to prevent color bleeding. Air drying is recommended to avoid fading and preserve the fabric’s integrity. For subsequent washes, continue using cold water and gentle detergent. Avoid direct sunlight and heat to maintain color vibrancy. Following these steps ensures your tie-dye creations remain bright and durable, while preventing unnecessary fading or damage.
Ensuring Long-Lasting Colors
To maintain the vibrancy of your Tulip tie-dye project, it’s crucial to follow proper care techniques. Always rinse thoroughly under cold water until the runoff is clear to remove excess dye. Avoid using hot water, as it can cause colors to fade. When washing, opt for a gentle, color-safe detergent and cold water settings to protect the dyes. Air drying is highly recommended, as heat from dryers can damage the fabric and dull the colors. Additionally, washing your tie-dye items separately for the first few washes prevents color transfer to other garments. By adhering to these care guidelines, you can enjoy your vibrant, long-lasting Tulip tie-dye creations for years to come.
Leave a Reply
You must be logged in to post a comment.